Roasted Pork Belly

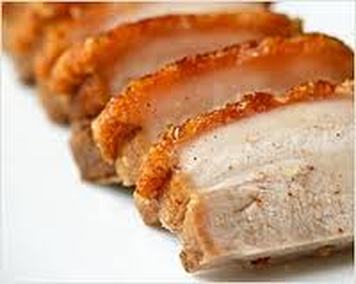
Roasted pork belly has become a firm favourite on the menu - it can be transformed into a magnificent dish beyond expectation. It is a juicy cut, very tender and with a good crispy crackling it will leave you wanting for more.
Suited for both roasting in the oven or on the braai makes it very versatile. It is an economical dish and widely available, but there are a few pointers on selecting a really good piece. The flesh must have a light pink color, firm and not have a watery sheen to it. There must be a good proportion of meat to fat and should have a sweet smell to it. It also helps if the piece is uniform in thickness and be a good size for your needs.
Suited for both roasting in the oven or on the braai makes it very versatile. It is an economical dish and widely available, but there are a few pointers on selecting a really good piece. The flesh must have a light pink color, firm and not have a watery sheen to it. There must be a good proportion of meat to fat and should have a sweet smell to it. It also helps if the piece is uniform in thickness and be a good size for your needs.
In the Oven or on the Braai

Preparing the pork correctly will ensure a good end result. Wash and dry the piece of meat. The belly part sometimes have a few remaining rib bones to it. It is best if these are removed to make cutting or carving easier. On the flesh side simply run a sharp deboning knife alongside and under the ribs and remove them.
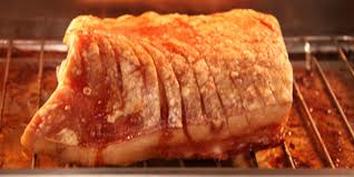
Using a very sharp knife score the skin at 1,5 - 2 cm intervals. These will be your cutting and carving lines. The lines should be across the grain of the flesh. This can be determined by looking at the side of the meat, the coarser side is the grain side and your scoring should be across the grain. Score deep enough to just where the fat stops and the meat shows through.
Run your fingers in the scoring lines while sprinkling salt into them. On the flesh side sprinkle with salt, black pepper, mixed herbs and a good amount of dried sage. Rub them in well and leave the meat to rest in the fridge, uncovered and skin side up until needed.
Oven Method:
Preheat the oven to 220°C. Prepare a roasting tin by filling the with 2 cups of water beneath the rack. Dry the skin side of the joint and sprinkle with coarse salt. Place the joint on the rack skin side up. Depending on the thickness of the cut the cooking time should be 45 -60 minutes. The steam from underneath will keep the flesh moist and succulent and the heat above should crisp up the crackling. The crackling could be helped along by using the griller, just make sure it is not to hot and doesn't scorch the skin - the longer it takes the better the crackling.